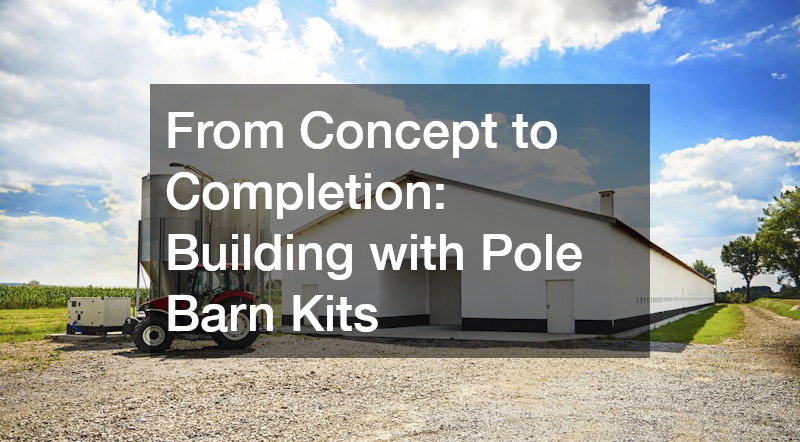
Constructing a new structure on your property is a major investment, whether it’s for storage, agricultural use, a workshop, or even a residential space. Many property owners are turning to pole barn kits as a practical, cost-effective alternative to traditional construction. These pre-engineered packages simplify the building process while offering flexibility and durability. From initial planning to final completion, understanding each phase of the project can help ensure a smooth and successful build.
Understanding What Pole Barn Kits Include
Pole barn kits provide most of the essential materials needed to construct a post-frame building. Unlike conventional stick-built structures that rely on continuous foundations, pole barns use large posts, either embedded in the ground or mounted on concrete piers, to provide the primary support system.
Most kits typically include:
- Pressure-treated posts or columns
- Roof trusses
- Metal roofing and siding panels
- Fasteners and hardware
- Framing components
Some manufacturers also offer optional add-ons such as insulation packages, windows, doors, and interior liner panels. Reviewing exactly what is included before purchasing helps prevent unexpected costs later in the project.
Step 1: Planning and Design
Every successful project begins with careful planning. Start by defining the purpose of your building. Will it be used for equipment storage, livestock shelter, a garage, or a hobby workshop? The intended use will determine the size, layout, and customization options needed.
Design considerations should also include future growth. Many property owners choose slightly larger dimensions than initially planned to accommodate potential expansion needs. Planning ahead can save time and money down the road.
Step 2: Budgeting and Site Preparation
One of the primary advantages of pole barn kits is cost predictability. Because materials are pre-packaged, it’s easier to estimate overall expenses compared to traditional construction. However, your total budget should also account for:
- Site clearing and grading
- Concrete work (if required)
- Labor costs (if hiring professionals)
- Electrical or plumbing installations
Preparing the building site properly is essential. The ground should be level, well-drained, and compacted to provide a stable base. Poor site preparation can compromise the building’s structural integrity over time.
Step 3: Foundation and Post Installation
The foundation system is a defining feature of post-frame construction. Instead of pouring a full concrete foundation, posts are set deep into the ground or secured to concrete footings. This method provides strength while reducing material and labor costs.
Proper spacing and alignment of posts are critical to the building’s stability. Careful measurements and secure anchoring ensure that the structure can withstand environmental stresses such as high winds or heavy snow loads.
Step 4: Framing and Truss Placement
Once the posts are set, horizontal girts and roof trusses are installed to form the building’s framework. Roof trusses are engineered to distribute weight evenly and provide structural integrity.
Accurate placement during this stage ensures the building remains square and level. Many builders appreciate that pole barn kits come with pre-cut and pre-engineered components, reducing guesswork and simplifying assembly.
Step 5: Roofing and Siding Installation
After the frame is complete, metal roofing and siding panels are attached. Metal is a popular choice due to its durability, low maintenance, and resistance to pests and rot.
Proper sealing and fastening techniques are essential to prevent leaks and improve energy efficiency. High-quality fasteners and weather-resistant materials help extend the lifespan of the structure.
At this point, the building begins to take its final shape, offering protection from the elements and showcasing its finished exterior appearance.
Step 6: Customization and Interior Finishing
One of the greatest advantages of pole barn kits is their flexibility. Once the exterior shell is complete, you can customize the interior to suit your needs. Options may include:
- Insulation for climate control
- Interior walls or partitions
- Electrical wiring and lighting
- Plumbing for bathrooms or utility sinks
- Overhead or sliding doors
Whether you’re creating a workshop, agricultural facility, or hobby space, the open-span design allows for efficient use of interior space without load-bearing walls limiting layout possibilities.
Step 7: Final Inspection and Maintenance
After construction is complete, a final inspection ensures the building meets local code requirements and safety standards. Addressing minor adjustments at this stage can prevent long-term issues.
Why Property Owners Choose Post-Frame Construction
Post-frame buildings have grown in popularity across agricultural, residential, and commercial sectors. Organizations such as the National Frame Building Association promote best practices and standards within the industry, highlighting the strength and efficiency of this construction method.
The streamlined building process, reduced material waste, and adaptable design make pole barn kits an appealing option for those seeking both affordability and reliability. When properly planned and installed, these structures offer long-term value and functionality.
From Concept to Completion
Building with pole barn kits transforms what might otherwise be a complex construction project into a manageable, step-by-step process. By carefully planning your design, preparing your site, and following proper installation procedures, you can create a durable and versatile structure tailored to your needs.
From the first sketch to the final inspection, thoughtful preparation ensures your investment delivers lasting performance and practical benefits for years to come.
Related Posts

How Landscape Supply Stones Add Value to Your Property
These stones are more than just decorative elements; they form an integral part of landscape design by providing structure and…

Affordable Ways to Refresh Your Home Exterior
This article explores affordable strategies for enhancing and revitalizing the exterior of your home. Discover how to leverage local services…
Key Benefits Tree Pruning Companies Want You to Understand
There are a few key benefits of tree pruning, and understanding the importance of hiring professional tree pruning companies can…